Tuesday, November 15, 2016

Kubota Mower Repair

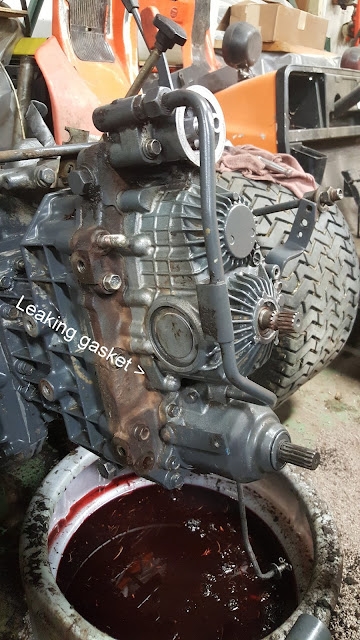
We had another complicated repair to make recently on the Kubota front mower used to mow slopes and uneven terrain with a flexible Lastec deck. It is an important machine as our other mowers with flat decks scalp the turf around the greens, tees, and bunkers. The machine was leaking fluid from a gasket on the hydrostatic transmission (HST). Normally, gasket changes are not that difficult, but on this machine the bolts needed to remove the transmission housing are located inside the tractor. The only way to access them is to separate the tractor completely and remove the transmission.

Here are some interesting pictures from the process:

Kubota F3060 after separating engine frame from front axle

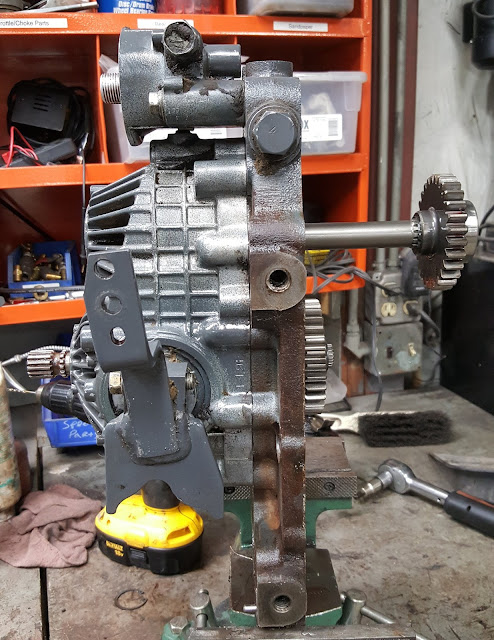
Hydrostatic transmission rear view

After more cleaning and disassembly

Inside of the tractor after removing transmission - amazingly clean for a 16 year old machine.

Inside of hydrostatic transmission

HST cylinder block - This little thing is what makes the mower move!

Reassembled with new gasket, o-rings, and seals
 The mower is now back together and working. Older machines are always an adventure. When I was researching this repair, I did not find much on the internet related to it. Luckily, I did have the workshop manual for this piece of equipment which was a pretty good guide. I share these photos because, first, they are pretty neat to look at (if you like machines), and, second, they might help another grounds crew or mechanic needing to do a similar repair.

Friday, November 4, 2016

Parking lot patching

Yesterday was a busy day. We winterized the irrigation system with a large compressor which is used to blow the water out of the pipes and sprinklers with air. This is crucial to ensure freezing temperatures do not damage the system over the winter. For the past several years, we have used a 825 cfm compressor which does an excellent job in around 4 hours. It used to take all day with a 375 cfm model. Getting the job done quickly was especially helpful yesterday because we are still open for golf and we were able to finish before most golfers came out to play.

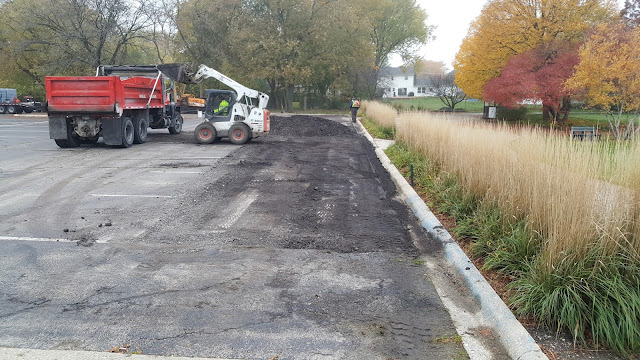
At the same time, we also had a contractor patching the most worn area of the parking lot. One area in particular of the roughly 40-year-old asphalt needed to be replaced as it had been worn away by flowing water and plowing. The result is a great improvement, although the parking lot has other areas of concern and some underlying base and drainage issues that will need to be corrected in the future. This partial and relatively inexpensive repair makes an immediate improvement for winter banquets and next year's golf season.

Step 1. Grinding the worn asphalt

Step 2. Removal and prepping the base

Step 3. Asphalt installed in 1.5 inch layers

Step 4. Final compaction
The area will also be re-striped to match the existing parking bays.

For comparison, below is the area before the patching. Over the past several years, the spent, old surface layer of asphalt was gradually washed away by water or plowed away with snow removal. The Midwest is particularly hard on asphalt due to our weather -- frequent freezing and thawing and often frequent winter precipitation that requires removal. Once an area is compromised, it usually deteriorates quickly.

Monday, October 24, 2016

Cart Path Repairs

Last week, 4 areas of crumbling asphalt cart path were repaved to make our paths more comfortable and safe for riding carts and walking traffic.  More pictures are posted to our Facebook page and website.  Below are some before and after pictures from the project:

Area behind #1 Green - Before

Behind #1 Green - After

Area left of #1 Green - Before

Left of #1 Green - After

5th Hole Green - Before

#5 After

Path by #3 Tee - Before

#3 After


Friday, October 7, 2016

Fence Repair on #7

The next step of our renovations around the driving range is nearly complete.  Before the Emerald Ash Borer, this area was packed with buckthorn and ash trees.  Removing the invasive species and dead ash trees has been a costly and time-consuming process.  First, the buckthorn had to be removed to allow access to the fence and the ash trees.  Second, the fence was cut and rolled up to allow the removal of the 75-foot-tall ash trees.  Third, around 160 ash trees were removed around the range by the Village of Villa Park's tree crew.  Fourth, the area around the back tee on #7 had to be renovated to allow cart access, improve drainage, and repair damage from the tree removal. Fifth, the stumps were ground and leveled. During these steps, several improvements to drainage, grading, and turf were made. The sixth step is repairing the chain link fence that was rolled up to allow access to the trees.  This is a tedious process that involves weaving the panels back together and stretching them down the line. 

Below you can see Gary weaving one of the last panels together:


With the fence back together, we can start adding the finishing touches.  Grass will be planted up to the fence on the golf course side.  On the driving range side, a mix of narrow-growing shrubs and trees will be planted in the future. Very few species are suitable for this area because we do not want them to grow into the driving range net or hang out too far and block the tee on #7.  We will also avoid planting a monoculture (meaning all one species of plant) to reduce large-scale losses to a species-specific pest in the future.

For reference, here is a photo of the area in 2013 as the ash trees were dying.  This is after a lot of buchthorn removal had already taken place. The concrete in the foreground is a piece of curb removed from the fairway bunker on #6 while we were renovating the bunkers that year:

Here is the same area from another angle:

The area looks quite different now, but from the perspective of the game of golf it is arguably better as the branches do not knock down tee shots and less time is lost looking for lost balls. Also, the trees and buckthorn in the area required a lot of maintenance and trimming even before the trees died, and they were causing damage to the driving range net.  While we would much rather have not had to remove the trees, we now have a fresh start in this area and can intentionally plan it to be more sustainable in the future.


Friday, September 30, 2016

Fairway mower wheel repair

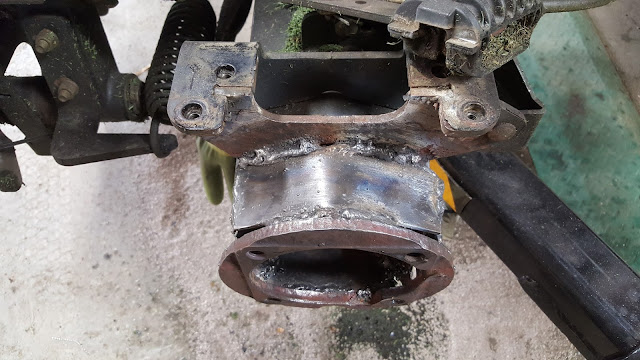
On Tuesday, the left wheel on the fairway mower looked crooked.  I was really hoping the lug bolts were just loose, but no such luck.  We have an interesting repair in front of us. The frame cracked on the wheel motor mount. 

Cracked frame
  
There is supposed to be a wheel there!
 A new front axle frame assembly is about $2500 plus many hours of labor.  We are going to try repairing the mount before going that direction.  After cutting out the paper thin rusted frame and grinding, I think we have something we can work with: 

Clamping up the new motor mount
   
New pieces of metal added to strengthen frame
Reinforced the top

Side view

Finished repair
The fairway mower is back in action and everything worked fine. I'm fairly confident the wheel motor mount is now stronger than it was new. Our fairway mower double cut the fairways today to catch up on the grass growth since last Thursday. We have had a lot of rain in the past week and the fairways were getting very long.  They are now back to normal height.

On a happier note, I had a visitor last week!

Saturday, September 17, 2016

Stump grinding

This week, we ground about 200 stumps around the golf course.  Many of them were here along the 7th hole and the driving range. After we fill in the holes, we can put the fence back together and start beautifying this area that was once filled with Ash trees taken by the Emerald Ash Borer:


Also, the new seed and cart path behind 7 tee are looking good:


Thursday, August 11, 2016

New roots in August!

A couple weeks ago, we used "bayonet" tines for the first time on the greens. The slices left were barely noticeable after rolling and mowing. A few days later, the marks were invisible but testing with a soil probe reveals excellent rooting in the channels opened up by the tines. In each of the slices, new roots have developed, sometimes down the entire length of the tine. Without venting, it is unlikely we would be growing new roots in August - especially this August.  The channels formed by the bayonet tines offer some much needed oxygen to the rootzone allowing golf courses to keep their greens healthy in tough conditions.
 
Bayonet tines on a Toro 648 with rear roller
 
New roots!

Tuesday, July 26, 2016

7 Tee Area Before and After

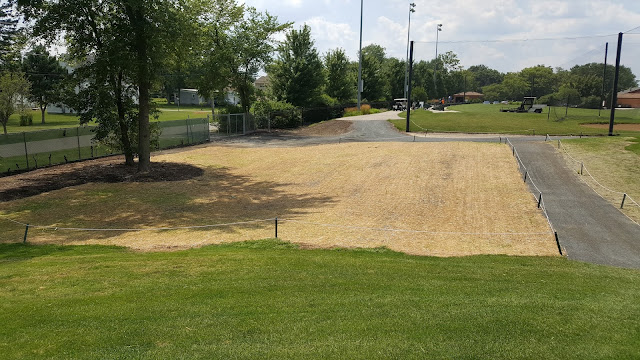
With seed germinating and the cart path installed, I thought it was time for some before and after shots of the area behind 7 tee.  This project accomplished several things: improved drainage, removal of old fill pile, improved cart routes, and safe access from the driving range to the course.  The "after" photos were taken after several rainstorms and the improved grading and drain lines performed as expected with no standing water in the area.
 
Looking back from 7 tee:
 

Before removing the pile and after:


Same area earlier this year and now:


Looking north after the drain was installed and now:


Early morning net repairs

Thanks, Stan!
 
Related Posts Plugin for WordPress, Blogger...