Showing posts with label Projects. Show all posts

Friday, November 4, 2016

Parking lot patching

Yesterday was a busy day. We winterized the irrigation system with a large compressor which is used to blow the water out of the pipes and sprinklers with air. This is crucial to ensure freezing temperatures do not damage the system over the winter. For the past several years, we have used a 825 cfm compressor which does an excellent job in around 4 hours. It used to take all day with a 375 cfm model. Getting the job done quickly was especially helpful yesterday because we are still open for golf and we were able to finish before most golfers came out to play.

At the same time, we also had a contractor patching the most worn area of the parking lot. One area in particular of the roughly 40-year-old asphalt needed to be replaced as it had been worn away by flowing water and plowing. The result is a great improvement, although the parking lot has other areas of concern and some underlying base and drainage issues that will need to be corrected in the future. This partial and relatively inexpensive repair makes an immediate improvement for winter banquets and next year's golf season.

Step 1. Grinding the worn asphalt

Step 2. Removal and prepping the base

Step 3. Asphalt installed in 1.5 inch layers

Step 4. Final compaction
The area will also be re-striped to match the existing parking bays.

For comparison, below is the area before the patching. Over the past several years, the spent, old surface layer of asphalt was gradually washed away by water or plowed away with snow removal. The Midwest is particularly hard on asphalt due to our weather -- frequent freezing and thawing and often frequent winter precipitation that requires removal. Once an area is compromised, it usually deteriorates quickly.

Monday, October 24, 2016

Cart Path Repairs

Last week, 4 areas of crumbling asphalt cart path were repaved to make our paths more comfortable and safe for riding carts and walking traffic.  More pictures are posted to our Facebook page and website.  Below are some before and after pictures from the project:

Area behind #1 Green - Before

Behind #1 Green - After

Area left of #1 Green - Before

Left of #1 Green - After

5th Hole Green - Before

#5 After

Path by #3 Tee - Before

#3 After


Friday, October 7, 2016

Fence Repair on #7

The next step of our renovations around the driving range is nearly complete.  Before the Emerald Ash Borer, this area was packed with buckthorn and ash trees.  Removing the invasive species and dead ash trees has been a costly and time-consuming process.  First, the buckthorn had to be removed to allow access to the fence and the ash trees.  Second, the fence was cut and rolled up to allow the removal of the 75-foot-tall ash trees.  Third, around 160 ash trees were removed around the range by the Village of Villa Park's tree crew.  Fourth, the area around the back tee on #7 had to be renovated to allow cart access, improve drainage, and repair damage from the tree removal. Fifth, the stumps were ground and leveled. During these steps, several improvements to drainage, grading, and turf were made. The sixth step is repairing the chain link fence that was rolled up to allow access to the trees.  This is a tedious process that involves weaving the panels back together and stretching them down the line. 

Below you can see Gary weaving one of the last panels together:


With the fence back together, we can start adding the finishing touches.  Grass will be planted up to the fence on the golf course side.  On the driving range side, a mix of narrow-growing shrubs and trees will be planted in the future. Very few species are suitable for this area because we do not want them to grow into the driving range net or hang out too far and block the tee on #7.  We will also avoid planting a monoculture (meaning all one species of plant) to reduce large-scale losses to a species-specific pest in the future.

For reference, here is a photo of the area in 2013 as the ash trees were dying.  This is after a lot of buchthorn removal had already taken place. The concrete in the foreground is a piece of curb removed from the fairway bunker on #6 while we were renovating the bunkers that year:

Here is the same area from another angle:

The area looks quite different now, but from the perspective of the game of golf it is arguably better as the branches do not knock down tee shots and less time is lost looking for lost balls. Also, the trees and buckthorn in the area required a lot of maintenance and trimming even before the trees died, and they were causing damage to the driving range net.  While we would much rather have not had to remove the trees, we now have a fresh start in this area and can intentionally plan it to be more sustainable in the future.


Wednesday, July 2, 2014

Drainage Repairs

When it is too wet to mow fairways, one of our favorite pastimes is finding and fixing old drain lines.  There are very few in the fairways so we have been finding the ones that are there and testing them.

We just found the old lines on the 4th fairway.  The good news is that the 4 inch line going to the creek works!  The bad news is that the rest of the system is thin 2 inch spiral corrugated tube that is not flowing.  It is crushed in many places.  There is a good reason 4 inch is the standard size.

2 inch drain line

In a situation like this we will get the system working as well as it can and install a catch basin here.  At least the 4 inch line heading off toward the top of the picture will take water and the pea gravel around the 2 inch lines is collecting some water.  In the future, reinstalling 4 inch lines in this area would help dry it out more quickly after heavy rain.  At least now we have a better idea what is here to work with.

Monday, March 11, 2013

A Sampling of Winter Projects

During the winter, golf course equipment needs to be maintained and serviced for the year.  We have finished our long list of preventative maintenance tasks and have moved on to the projects that can add new life to old machines or extend the life of a newer machine.
Rusty mowing decks get scraped and repainted. This adds many years to the life of these decks.  If allowed to rust, the structural integrity of the deck is compromised.
Rusty LandPride rotary deck 
This year we tried a product called "Rust Reformer" as a primer after wire brushing off the loose material. It claims to "convert" rust to a paintable surface. Not sure what what that means, but it sounds good. Time will be the judge.  As auto body workers have told me, inspired by Neil Young of course: rust never sleeps.
Rust reformer on LandPride Deck 
We also tiled the bathroom and put up waterproof panelling this winter:
 
Here is a bench waiting to go out on the 4th hole Red Tee.  It was donated by the Carey family who lived across the street from the golf course for many years:
 
Our 1996 sprayer now sports new plumbing and a "Cleanload" eductor on the side. This is the black container on the side. It will be used primarily for disolving granular fertilizer and mixing it into the tank.  Many people aren't aware of this, but we actually use our sprayer most often for fertilization.
 
These are just a few projects that the Superintendent and Equipment Tech completed over the past few months. We are ready to turn our attention more to the outdoors! Spring is coming soon.

Tuesday, April 24, 2012

Tale of the Trap -- Part 2

Work is complete on the sand trap in front of the green on the 8th hole.  Many golfers have commented that the new trap and surrounding area will be easier to play from in some ways and more difficult in others.  Of course, the idea is to avoid it altogether! 
Here are some pictures of the construction process:
Moving soil and compacting
The new trap takes shape
The new banks are sodded
The sand has arrived!
Once the sod has fully rooted, this trap will be open for business.  Currently, it is still marked Ground Under Repair so golfers can take a free drop if they enter the area. 

Thursday, March 22, 2012

The Tale of a Trap

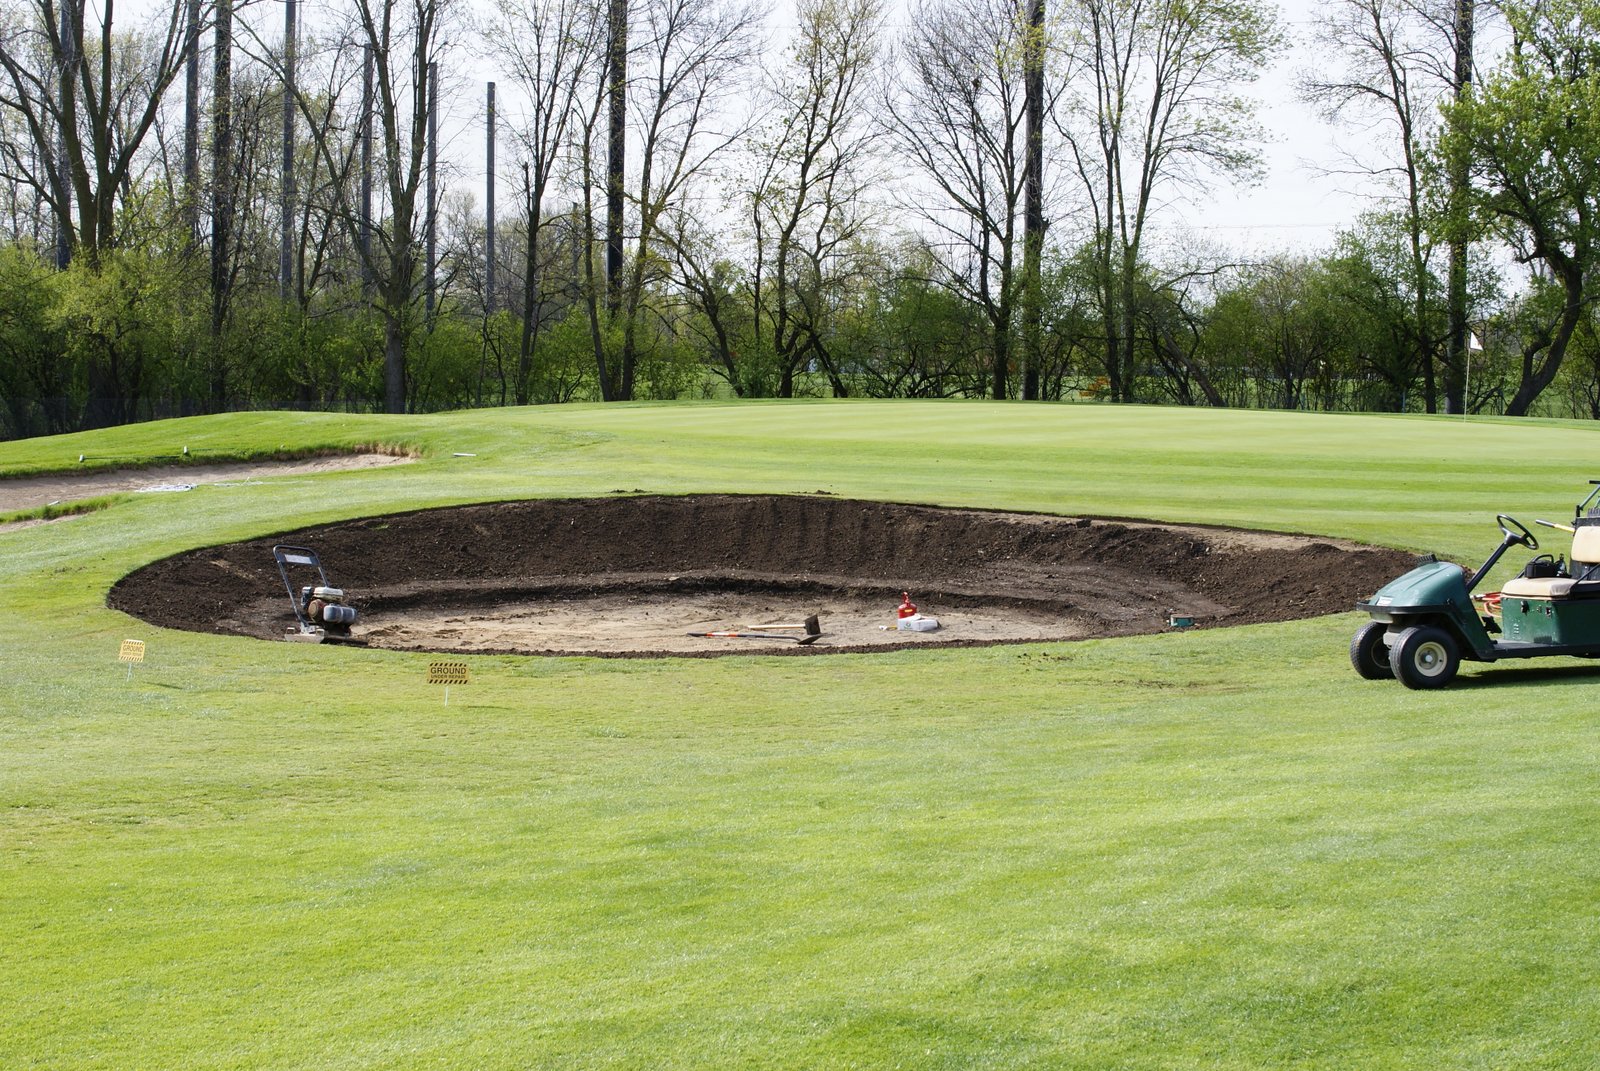
Today, we began work on the sand bunker in front of the 8th green.  This area is currently "Ground Under Repair," meaning any golfer who 'accidentally' hits a ball into the trap may drop a ball no closer to the hole with no penalty.  If you would like to learn more about the history of this bunker, read on. . .
History

The bunkers at Sugar Creek were built in 2004 as part of the course improvements.  The trap in front of the 8th green is a vital element of the hole's design as a short but challenging par 4.  Without the bunker, golfers could "go for the green" with a driver without much risk -- if hit straight of course!  The bunker creates a nice "risk versus reward" situation for the long drive hitter and doesn't penalize the short drive hitter.  The placement of this bunker makes good sense for the hole.  It has, however, been difficult to maintain since it was built.

Here is the bunker at its best last year:

Unfortunately, the crew can only get the bunker in this condition with Mother Nature's help.  This picture was taken during a dry spell with no rain for 2 weeks.  The trap is playable under those circumstances, but any rain puts this in jeopardy.

This bunker has several problems:  
  1. The top lip is dug into the sub-surface of the green so it is always crumbing
  2. An old drainline from the green oozes water into the trap
  3. The trap has been "over-edged." Every time the top lip crumbled, it was edged back a foot or two. From digging around, I can tell the original shape of the trap was a full 10 feet smaller! This edging has only made the situation worse.
  4. During a heavy thunderstorm, water flows off the green straight into the trap.  This fills it with water and mixes soil with the sand stopping drainage.
 In short, this happened too many times:


Every time the bunker "washes out," the sand becomes mixed with soil and loses more and more of its ability to dry out. 

The Fix

To solve these problems, we are going to . . .
  1. Restore the bunker to its original shape
  2. Build a soil barrier between the green's sub-soil and the bunker
  3. Clean sand and soil from drain lines and add clean-out ports so we can keep the lines clean
  4. Shape the top lip to route as much water as possible away from the trap
  5. Sod the top lip with bluegrass to slow sheet flow during a storm
  6. Replace the contaminated sand and pea gravel with clean materials
With these modifications, the bunker should drain and function better than ever.  Stay posted for "Before and After" pictures!

Update:

A golfer just asked me not to fix this trap.  He said he enjoyed the "Combo hazard" -- you never knew if it was going to be water or sand!  Unfortunately we are too far along to stop now.

Friday, December 9, 2011

Time to Grind

If you walk past a golf course maintenance facility this time of year, you will most likely hear the sound of grinding wheels, air rachets, and other assorted power tools. Winter maintenance of golf course equipment is essential to keeping them sharp and operational. At Sugar Creek, we use two Neary grinders to spin-grind reels and grind bedknives back into cutting shape. These grinders are considered "classics" but they do their job well if you are careful and treat them nicely.  Throughout the season, we touch-up and adjust these reels twice a week but winter is when we re-grind and re-set all the cutting angles and surfaces.

Here are some pictures of Greens King IV reels being worked on:

Our equipment technician uses very precise gauges and calipers to ensure that the reels are not slightly cone-shaped or the bedknives tilted. He often uses this Interapid indicator to test within a 10,000th of an inch if everything is coming out straight and parallel. Here you can see the indicator being used on the bedknife grinder:

Winter is when golf course equipment technicians shine. In addition to sharpening and grinding reels and blades, they change bearings, grease joints, change oil, rebuild engines, service hydraulics, replace brake pads, and a whole bunch of other stuff that I won't list here. After finishing grinding and preventative maintenance on the machines, we will be replacing the reels on the fairway mower and refurbishing the groomers on our greens mower early next year.


In the above photo, you can see the groomer blades on the greens mower cutting units.  The bearings and adjustment hardware are worn out making it very difficult to set them precisely and have them stay there.  Grooming is tricky as it is without having the cutting depth change on you.  Ideally we like the little vertical blades to go into the "canopy" of the turf just slightly and lift up leaf blades that are getting too long or running sideways (about .030" below height of cut on greens).  Having groomers too deep could damage the green and would eventually break groomers -- for deep cutting we have verti-cutter units.  Going too shallow will have no effect at all.  Since accurate adjustment is so important, the bearings and hardware on these groomers needs to be replaced once in a while to produce a quality results.

Somebody once told me Superintendents swear by groomers; mechanics swear at them.  This will most likely be true in our shop sometime in mid to late January when we take them apart and start fixing them up. 

Friday, September 23, 2011

Aerifying Day 2011

It's that time of year again!  The greens at Sugar Creek were aerified on September 21 with a deep tine machine that loosens up the ground up to 8 inches deep.  Aerifying is essential to the long term health of a green.  Here are a few pictures of the process.

We started spreading sand before the deep tine machine this year.  This helped it dry out before brushing.  Here is the deep tine machine on the first green:


Topdressing the greens:


In this photo, you can see the brush in action on the 5th green and the tractor aerifying the 7th green:

After brushing as much sand as possible into the holes, we used some custom built brush reels on the old greens mower.  These reels have a bedknife set to a little under our usual height of cut.  Brushes then come around to pick up extra sand and debris and collect it in the baskets.  These brush reels help to create a puttable surface:


After the first day, the greens look something like this area:


We try hard not to over-sand them even if all the holes aren't full to the top. It is easy to add more sand later but very difficult to get rid of too much.  After testing many spots, the holes almost never interfer with putting after we roll the greens out.  At least in my opinion, excessive sand is more difficult to putt on and can delay recovery. 

At the end of the process, we used a pull behind roller to smooth out any bumps.  One of the difficulties of dealing with recently aerified greens is dew in the morning.  The next two mornings were too dewy to mow or roll the greens without making them clumpy and unputtable.  Instead, we will be brushing and mowing them in the afternoon after they have dried out. 

They are putting smoothly and especially in the dry afternoon are almost too fast.  Some golfers even told me they loved putting them the afternoon after they were done.  Others said they liked the challenge of the different speed.  I hear a rumor that some golfers are not big fans of aerification, but I haven't run into them yet . . .  Well, maybe one or two!

Wednesday, September 14, 2011

Summer of 2011 : Seeding Fairways

Meteorological summer is over and it has definitely cooled off in the Chicago area -- just barely dipped under 50 last night in many areas.  The last month has been a busy one at many golf courses in the area struggling to recover from late July's rain and heat.  Luckily, August was not extreme: 1.1 degrees F over normal and about average rainfall.  This meant that it was possible to get seed to grow in fairway areas.

In the last 5 weeks, we experimented with several methods of seeding and aerification in the fairways.  We used a slicing knives several times in an attempt to break through the thatch into soil.  This worked in some spots.  We also used an Aera-vator with a seeder to spike seed and cultivate areas.  Other areas we used a Ryan Mataway slit seeder.  All three methods worked to one extent or another.  The trick is to get seed-to-soil contact without making the situation worse or delaying recovery. 

Seed growing in aeravator holes
Some of the plants you see are not new seed.  Most of these areas in our fairways are composed of annual bluegrass, or Poa annua, an annual grass with lots of seed in the ground.  It is very aggressive in spring and fall, but often dies in summer.  In some of these areas, our new seed may have gotten started early enough to establish before the annual fall resurgance of Poa annua.  In others, Poa will likely take back over. 

You can identify Poa annua by its bunch-type growth, yellow-green color, and "boat-shaped" tip:

Annual blugrass boat shaped tip
Annual bluegrass is not exactly what we want to see because it is the species that died in the first place, but it is turf and you can play golf on it!  There isn't any way to stop it without stopping our new seed also, so superintendents have to constantly manage it. 

About three weeks ago, we slit-seeded the first fairway and it is starting to fill in:
First Fairway slit seeding

It is easier to see the fuzzy new grass with dew on it
Finally, an area on 7 fairway that suffered from water damage needed more aggressive tactics.  Using an Aeravator, rake, and roller, we essentially cultivated and seeded the area around this drain:

 The seed germinated very quickly and is doing well.  If you click on the image, you can see them more easily:

Seedlings on 7 Fairway
Many other areas have already recovered from early August and the rest are filling in quickly.  September has really been a nice month!

6th Hole

1st Green

Update September 22, 2011:  Seedlings are really filling in on our fairways.  The renovated area on the 7th fairway now looks like this:
7 fairway
Overall, we have had a lot of success this year replacing pesky Poa annua with bentgrass and bluegrass.  Hopefully these seedlings will toughen up before winter and make great turf next year!