Yesterday was a busy day. We winterized the irrigation system with a large compressor which is used to blow the water out of the pipes and sprinklers with air. This is crucial to ensure freezing temperatures do not damage the system over the winter. For the past several years, we have used a 825 cfm compressor which does an excellent job in around 4 hours. It used to take all day with a 375 cfm model. Getting the job done quickly was especially helpful yesterday because we are still open for golf and we were able to finish before most golfers came out to play.
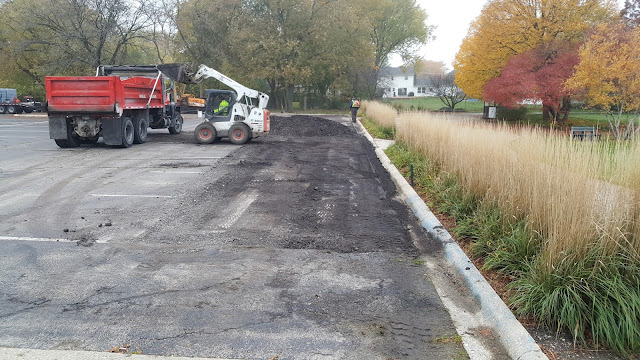
At the same time, we also had a contractor patching the most worn area of the parking lot. One area in particular of the roughly 40-year-old asphalt needed to be replaced as it had been worn away by flowing water and plowing. The result is a great improvement, although the parking lot has other areas of concern and some underlying base and drainage issues that will need to be corrected in the future. This partial and relatively inexpensive repair makes an immediate improvement for winter banquets and next year's golf season.
 |
| Step 1. Grinding the worn asphalt |
 |
| Step 2. Removal and prepping the base |
 |
| Step 3. Asphalt installed in 1.5 inch layers |
 |
| Step 4. Final compaction |
The area will also be re-striped to match the existing parking bays.
For comparison, below is the area before the patching. Over the past several years, the spent, old surface layer of asphalt was gradually washed away by water or plowed away with snow removal. The Midwest is particularly hard on asphalt due to our weather -- frequent freezing and thawing and often frequent winter precipitation that requires removal. Once an area is compromised, it usually deteriorates quickly.


